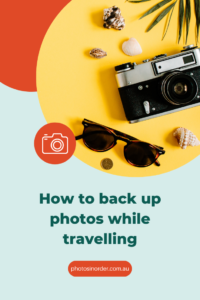
How to Backup Photos While Travelling
July 10, 2021I have travelled quite a bit in my life, mostly before I had a digital camera and a smart phone, and backup was never even mentioned. So, after the holidays, I had a few rolls of film that needed developing. From there, they went pretty much straightaway into an album. Easy peasy … until our children came along and we bought our first digital camera and a video camera.
These days, digital cameras come in all sizes and shapes. There are also several other devices such as iPods and tablets, and of course a mobile phone that takes pretty good pictures and is easy to carry around.
Especially when travelling, these things can easily get lost, stolen, or damaged and you might lose all of those precious photos you took (possibly even those taken before your trip if you haven’t got a backup system in place). So, what can you do to keep your photos safe and backed up during your trip?
I’ve listed some options for you and have tried to cater to as many needs and budgets as possible. Just go through the list and find which method suits you most. You may even vary between methods from one trip to another depending on where you go.
Photo organisers recommend that you save three copies of a photo (more in this post here). This might not always be realistic while travelling but keep it in mind. Also, downloading your photos to a backup place and then deleting the photos on your camera is not a backup – it’s just a relocation of your photos!
These are general tips and I haven’t tried all of the mentioned methods and products. Technology changes all the time so please do your own research with regards to the equipment you need.
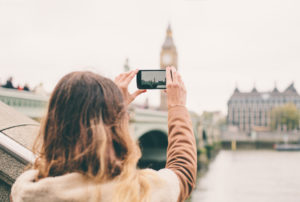
Backup from a Phone
To the cloud (automatically or manually)
You might think that the whole topic is a no brainer because you just upload everything to the cloud, possibly even automatically. Well, when you’re travelling you might not have easy internet access or possibly only a very slow connection. Therefore, in many cases, the cloud will not be an option.
However, if you do have internet access it is a great way to backup your photos. Especially because photo organisers recommend that you not only have three copies of a photo but also in two different locations.
I recommend checking out Forever , which is a very good option to auto-upload your phone photos to a safe place in the cloud. Using this link here, you can get 2 GB for free to try it out.
Dropbox has worked well for me in the past. There are of course lots of other services such as iCloud, OneDrive, Amazon Drive etc.
A word of caution: read the small print of all providers before you make a choice. Just as an example: there are some who will charge you if you want to download your photos from their cloud service or with some of them you won’t get back the original resolution or you might have to download them one by one which takes ages.
To a portable hard drive with WiFi
Together with the right app (depending on your phone) you can copy your photos wirelessly to a portable hard drive. An example is Seagate Wireless Plus or InfinitIKloud that even has an SD card reader included!
To a portable hard drive without WiFi
This is a bit trickier because you will need a computer via which you can copy your photos to (see below how to do this). Don’t shy away from the idea of using a portable hard drive. I use Seagate all the time and they’re really light and small; perfect to carry around. If you can, I’d recommend going for a portable SSD such as a Samsung T7.
To a computer
If you take a laptop on your trip you simply need to connect your phone to your computer and download, or rather copy your photos (remember – if you download and then delete them on the phone it’s not considered a backup!). To be even safer you could then copy the images to an external hard drive or USB to backup your computer – et voilà: you’ve got your three copies!
You may also use a computer in a hotel business centre or in an internet café if you travel without your own.
To a USB flash drive for smartphones and tablets
There are various USB flash drives which you can connect directly to your phone and download your photos to. They come in various sizes and are pretty easy to carry around. This is definitely a favourite of mine. Note for iPhone users: this is only going to work if you store original sized photos on your phone. If they’re optimised, it might miss some. If you’re not sure, check in your phone settings.
Examples are the PictureKeeper (available for iPhones and Androids), SanDisk iXpand for iPhones.
To a tablet
The fastest way if you don’t have internet access is probably to use Airdrop (Apple only), which creates a peer-to-peer network. SHAREit works similarly for non-Apple devices.
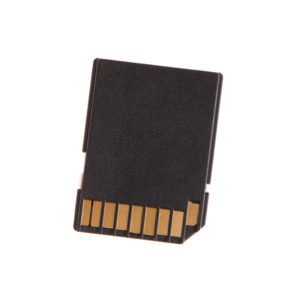
To an SD card
Most Android phones actually include a mini SD card. Make sure in the settings that this is where the photos are stored. If you want to transfer photos from the SD card please see below for options.
iPhones cannot export or copy photos from the phone directly to an SD card. It is only possible via a computer.
Backup from a Camera Memory Card
Remove the memory card from your camera (or your Android phone) and use a card reader to import the photos to a computer, your phone, a tablet, or another mobile device. Make sure you have the correct reader/s and adapters with you.
If a computer and a portable hard drive is too much to carry along, a memory card backup system like a Qubii Pro or the above mentioned InfinitIKloud might be the ideal solution.
Backup from a Camera via USB Connection
Connect the camera to a computer via the USB cable and copy your photos. While you’re at it, you might make another copy to an external hard drive or to the cloud if you have internet access.
Wireless Backup from a Camera Memory Card
Invest in a wireless SC camera card which can transfer photos wirelessly to your device or computer. Keep in mind that the camera will have to be powered on while photos are transferred which requires battery power.
Once you have copied the photos from your camera to a computer or other device, you can use the above-mentioned tips to back these up.

Before You Travel
- Work out a backup plan that suits your needs.
- Make sure you have all the necessary equipment formatted correctly (especially portable hard disks).
- Don’t forget at least one international power adapter.
- Think about how you want to transport these things so they stay organised and safe. Try to keep the camera away from the backup.
- Make sure all your cameras always have the correct date/time setting (of the time zone you’re in when taking the photo). It will make your life a lot easier because you will automatically have the correct chronological order (especially if you use several cameras and devices).
- Once your trip has started, keep in mind to set aside some time to backup your photos regularly.
- Enjoy your holiday!
After Your Trip
Remember, these backups are meant to happen while you’re travelling. If one of the copies you made is now already in your photo hub (e.g. Dropbox or Apple iCloud Photos Library) it will save you the time to download everything again. If they are not in your usual hub yet, you’ll have to move your photos to your hub as soon as possible and use your usual photo management workflow.
Enjoy your trip!
Please note that this post contains affiliate links. If you follow an affiliate link and purchase that product or service, I will be paid a small commission, however your cost will be the same. I only recommend products or services I know and trust.

0 Comments